This is our busy time of year at the shop so I have not had the time to post as often as I'd like.
A lot has been done since my last post. I'll add more pictures soon as time permits.
The hull stiffeners are completed. Three layers of biaxial cloth was glassed over the ballast pig forming a new cap and an 18 gallon holding tank was glassed into the hull.
The prop shaft, stuffing box and stern tube were removed and the old glass ground out and three layers of biaxial glass was applied.
The aft (cabin) bulkheads were installed as were the partitions in the lazzerette and under the cockpit. The floor partitions were installed and a temporary floor put down.
A customer who had the same little diesel as I salvaged out of the O'day made me an offer I could not refuse and bought the diesel from me. His was not repairable and mine was a drop in replacement for it. I purchased an electric motor, controller, etc and will be putting them into the vessel this winter.
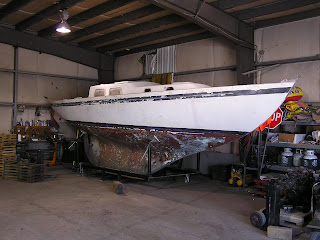
Last week we moved the vessel from the back yard of my home to the shop where I work and it will be stored inside a heated building for the winter so I can continue the project during the cold weather. Last winter we had several trees come down, some uncomfortably close to the vessel, I am grateful to my boss and good friend Gary Dawes for letting me bring the vessel to the shop for the winter! He says he likes the fact that I can't call in sick to work on my boat anymore! :-)


