Monday, December 14, 2009

Dis & Dat

With snow predicted in the near future we spent the day outside stripping all of the fittings off of the salvaged sailboat out back. We managed to get em all before the snow flew. The stanchions are much more modern and are in better shape than the Albergs so we will use them instead of the originals. The pulpit was placed on deck and looks like it will fit well also with a little alteration.

We did a little more work with the longboard, and did some DA sanding on the Hull, little by little, bit by bit, the sanding gets done.

I was thinking about a dodger and put out a request for some pictures and measurements. A big thanks to John Irving for the pics and measurements of his boat, and to mom and dad for taking a bunch of pictures of the dodger on my bro's boat and sending them so quickly.
I always liked the way the front of that dodger is a hard dodger and the back is canvas that could be folded forward. I laid the pictures on the cabin top and hot glued together a very crude stick frame with a cardboard front panel. I find it really helps me develop reference points if I have a crude mock-up of what I'm trying to visualize. I temporarily put the companionway steps in place and climbed in and out of the cabin adjusting the stick frame as required for easy access and proper clearances. Then I sat back and stared at the pictures and the mock-up for a good half hour, visualizing what to create. I wanted curves and not hard angles on the front........the top should have the same camber as the cabin top. We'll start there! A Half inch foam sheet was laid atop the cabin and two layers of biaxial cloth was applied to the top.
The following day it was cured so we trimmed its width, made a couple temporary brackets for it, and put it in place above the hatch. It looks pretty good sitting there, we will work on it over time to break up the monotony off sanding the hull.

Wednesday, December 9, 2009

Deck Fittings

Sometime in the past a previous owner attempted to repair the deck under various deck fittings by simply doing a little superficial grinding and then pouring polyester resin into the void. In some places there was no grinding done and the resin was simply poured into the depression made by the fitting and left to cure in a puddle on deck. I ground out all of the resin, then down through the core to the lower laminate. Removed the core material about half an inch depth from between the laminates around the edge of the repair then filled all with west system epoxy mixed with 404 high density filler. Once cured it was tooled as required and glassed over with mat backed biaxial cloth. This was done to all the deck fitting locations as they had all been previously repaired to some degree. Should make for a secure footing for the fittings now.

While I was in a glassing mood I prepped the top of the companionway hatch and laid in some glass. Once cured it was faired and is ready for paint.

I can sense some who may be aghast.......paint! Where's the bright work that was the original! My boat will have almost none on deck. Don't get me wrong, I love admiring a pretty vessel with lots of bright work. But alas my vessel will be moored under the intense tropical sun and I will be away from her for long periods of work and don't want to spend the time I will have aboard maintaining bright work.

Tuesday, December 8, 2009

Jordan Drogue

Jeff has owned several sailboats of his own and has sailed with me on my vessel in the past. He is joining the vessel for her first offshore passage to Hawaii and I feel very fortunate to have him aboard for the passage. While I was visiting with him in Honolulu he offered to put forth some funds for the voyage. I suggested he put it towards some safety / survival gear and we discussed our past adventures and storm tactics and what we might like to have aboard. Aside from the mandatory Jack-line and harnesses, we felt a good drogue would be a very usefully piece of gear.
I thought back to the time I was in sixty knots of wind and surfing down monstrous waves on the way to Hawaii in my twenty six foot sloop. She would lift her stern to the wave then begin to surf down the face until we matched the speed of the wave and lost steering, then she slewed, her stern falling abruptly off to starboard, steering would be momentarily restored and she would be straightened out and then slew off to port. We careened down the wave in this sickening zig-zag manner on the verge of broaching.
After the second time that happened we came about and hove to. A precarious task in those conditions. The ride was much better with the exception of the odd wave crumbling underneath us dropping us with a hard jarring, or slamming hard against the windward bow, tossing the boat and launching us off our feet if we were standing, or hard into the Lee cloths in our bunks. I rubbed my bruised ribs wishing I had the foresight to bring chest protectors and hockey helmets. Jordan drogues would not be invented for a number of years.

We definitely wanted to have a Jordan drogue aboard this time.
We researched the drogue and both quickly agreed we did not want to spend time sewing together over one hundred cones, better to order the cones from a reliable source. We could handle assembling the drogue. During our research we kept seeing Ace Sailmakers referenced as a source for drogue parts. I called them and left a message Friday night, Saturday morning they returned my call and spent a lot of time on the phone answering all my questions and making some very good suggestions. I ordered the cones from them and it was a very pleasant experience; every time I called to check status or ask a question my call was promptly returned with an appropriate response to my question.  The cones arrived well packaged and in good condition. The workmanship and construction is very good. They included a stack of literature; diagrams, assembly notes and tips, testimonials.....and even included an installation tool (at no charge) to make it easier to put together. I recommend them if you are in the market for a drogue.


Thursday, December 3, 2009

Portlights

We've been doing a great deal of long-board sanding on the hull and deck joint and thought it would be a good time to mix it up a bit and do something other that rocking fore and aft with the long-board. So we tackled the task of fitting the port-lights we got from New Found Metals.
It was apparent that it would require a fair amount of altering of the existing port-light opening to fit the new ones, so we ordered the installation template from New Found Metals. When it arrived we checked it against the port-lights and it was a good thing that we did,......the mounting holes were WAY off on the template! I sent it back and emailed NFM only to find they did not have the correct template on hand.


We ordered the trim ring spacers for the inside of the ports as we had too much of the ports protruding out the cabin side the way they were. The teak trim rings were  delivered in a timely manner but the quality was not of the same standard as the ports.
Each one is made from four pieces of teak and no effort was made to ensure the pieces were even close to the same color. The end pieces on some were much lighter than the rest of the pieces, giving it a chunky look. The frames were rough and one had a notch caused by careless routering at the factory. Fortunately the port-light covers much of the trim ring and after some careful sanding and finishing to blend the colors they would do.

We used the trim rings as guides and drew the cut-outs on the cabin sides and cut them out.


The port was fitted several times and adjustments made until we were happy with the fit.


Inside the cabin the area under the trim ring was sanded to bare glass and the trim ring was bedded with 3M 5200 and installed. After the 5200 cured the port was removed and the outside of the cabin was glassed and faired as required. The ports were then installed and bedded with 5200. Now I know there are those that feel that 5200 is overkill and would prefer something not quite as tenacious in case the port needs to be removed in the future. Those folks have never had to climb into a wet bunk under a leaking fitting on a three thousand mile passage........been dere........done dat ........my boat fittings get bedded with 5200 and I have never had one leak. Boats on long passages are subject to endless flexing and twisting cycles and I have yet to find a better adhesive bedding compound, and though the fittings can be difficult to remove its not impossible.

Tuesday, November 17, 2009

Boat Slip

After several years of being on the wait-list for a slip in Honolulu I finally got the call!
"Mr. Lang,....you are first on the list now for the next available slip".
I flew to Honolulu for a week and checked on the slip while I was there.
Spent a lovely week in the sun and reminded myself of why I'm sailing in that direction.
Thank you Jeff and Sulu for being such good freinds and fantastic hosts!


Monday, November 2, 2009

Head Dorade Box


A big thanks to David Fisher aboard Kalitsah (A30 # 440) for the heads-up regarding the potential leaks from the dorade  box into the liner. I cut the dorade box off the deck and could see where it had indeed been leaking into the liner. I will refit the area and seal it up well and replace the dorade box with a hatch.


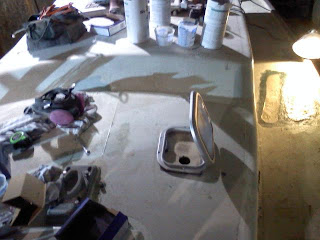
Tonight I got to it and drew the hatch cutout onto the deck with a pencil and rough cut the straight lines with the Fein Multimaster tool. The radius corners were then shaped by using a ZEC grinding disk in a 4-1/2" grinder turned on its side. Those disks remove a lot of material very quickly without gumming up the disk. The hatch dry fit well and now there is a little hand work to be done before the trim ring is fit inside and the deck can be sealed and prepped for bedding the hatch.


Sealed and fairing coat applied


Wednesday, October 28, 2009

Hull & Deck Joint

One small area of the hull / deck joint on the starboard side aft near the cockpit had "popped" open last winter. After carefully examining the joint it appeared that no compound was used on the joint when it was constructed. The joint was simply pop riveted together and sealant was placed under the wood cap rail when it was installed.


That would not be sufficient for offshore sailing so I decided to glass the joint along its entire length. The joint was refastened along its entire length taking care not to put a fastener where it would interfere with the genoa track fasteners when it becomes time to install it. The hull above the cove stripe was sanded down to bare glass.  The cap was sanded to bare glass and colloidal silica was mixed with epoxy and used as a fairing compound (white areas under the glass).
Biaxial cloth was cut into four inch widths and two layers were applied over the joint using west systems epoxy.


A mixture of West systems 406 & 407 was mixed and applied as fairing compound. The first layer of fairing compound was applied rather thick and once cured was sanded using a six inch DA and forty grit paper.


This method enabled us to get too the final fairing coats very quickly. The next fairing coat was applied very carefully using a magneisium trowel and keeping the lower edge of the trowel held firmly against the top of the cove stripe. The joint is now ready for its first fairing with a long board.

Thursday, August 27, 2009

Boss Lift 2009

We have had several details and paint jobs to do at our shop. As they are done in the same building as my sailboat I had to halt work on my boat for the month and not make or disturb any dust in my area.
I managed to catch up on all the undone chores around the house and participate in Boss Lift 2009.
If you have a reservist as an employee you can be nominated to attend; its two days of hands on "lets show them what we do" events and displays. I was delighted to be nominated and attend, it was an eventful two days I will never forget. We flew in C-130's, blackhawk choppers, fired weapons sims against terrorists, drove the M-4 tank simulator, flew the A-10 warthog simulator , called in fire support, launched drones, and climbed all over and thru a variety of vehicles and equipment, and aircraft.
It began at 0630 with a C-130 transport picking us up at the Coeur d Alene airport heavy lift ramp. We all climbed aboard and strapped in and off we went.


Once up to altitude they oppened the ramp so we could have a look out


 They closed the ramp and invited us to unbuckle and explore the aircraft. Gary and I headed up to the cockpit to check it out.


When we arrived at the airbase we were given lunch and had a welcoming ceremony and then it was off to experience a sampling of the training that takes place.
They laid out a bunch of weapons for us to fire on the simulator range. They are real weapons that recoil and behave as if they had live rounds in them.
 
We fired at a terrorist scenario at a refinery, it was pretty cool.
After that we were given a demonstration of the up-armored Humvee trainer. They roll it to thirty degrees, then 90, then 180 and practice evacuating the vehicle in a roll over and setting up a defensive perimeter.
The doors on the up-armored vehicle weigh more than 700 lbs so when its on its side they are to heavy to open and the only way out is through the roof turret.
 
Gary checks out the Humvee
 
Then it was off to the Abrams tank where we got to climb all over it and sit in it and then go into the simulator and try our hand at targeting and firing on enemy vehicles........ok,....this one was a lot harder than I thought it would be and I was very surprised to learn that the temperature inside the tank is well over 100 degrees when used in the desert.  We were not allowed to take pictures inside of  the tank or simulator.
After a very busy afternoon they laid out a very nice dinner for us in the officers mess and we called it a night.
The next day we were up early and at it again! We boarded Black Hawk choppers for a flight out to the desert where they were practicing and had set up some displays for us.


 They launched a drone for us and then we went into the command tent where they called the shots and observed them at work.
 
The pilots of drone fly it from inside a container that can be transported on a Humvee, we were suprised to walk around the back of it and open the door to see the pilots flying the drone while the container is on the truck. Now that's a mobile unit!


After checking out the displayes we boarded the choppers for a flight back to the base.
 
 
Once back at the base we got to fly the A-10 warthog simulator. As a pilot this was the highlight of the trip for me. It was a truly amazing experience! The multi-million dollar simulator had a moving view everywhere you looked,..above, behind, down on both sides of the aircraft,.....it was amazing to fly. I did a strafing run on several targets (got em all!) and then pulled up and rolled inverted. She was not real happy inverted so I rolled her back over to 90 degrees and put her into a very tight left turn. It cornered like it was on rails!
I came out of the simulator trembling from the adrenilin that was still coursing through me.
Regrettably, the simulator is clasified and all cell phones, cameras, and devices capable of recording images or sound was confiscated before we were allowed to enter the area so I was unable to get any pictures of it.
After that it was back to the flight line to climb around and check out the aircraft.
 
Gary checks out an F-15
  
My favorite; the A-10 warthog


They had several F-15s and A-10 buzzing around while we were on the flight line. It was hard to get good pictures of them with the delay of my digital camera.