Saturday, August 11, 2012

Nesting Dingy

The inflatable dingy we used as a tender was getting a little threadbare and since it had no motor, it severely limited our options for use. An inflatable can be very difficult to row in the trade winds.
I decided to build a nesting dingy and after a little research online I settled on the Chameleon nesting dinghy designed by Danny Greene. If you would like a set of plans click his name for the link.
Mr. Greene returned emails promptly and a set of plans arrived within ten days which I thought was very quick considering he lives in Bermuda and I'm in Hawaii!

I have never built a "stitch & glue" dingy before and thought it would be a fun project.
This one would be built outdoors, without the comforts of a shop.
The dingy is 10' 4" overall length, about 4' wide, and is reputed to row and sail well.

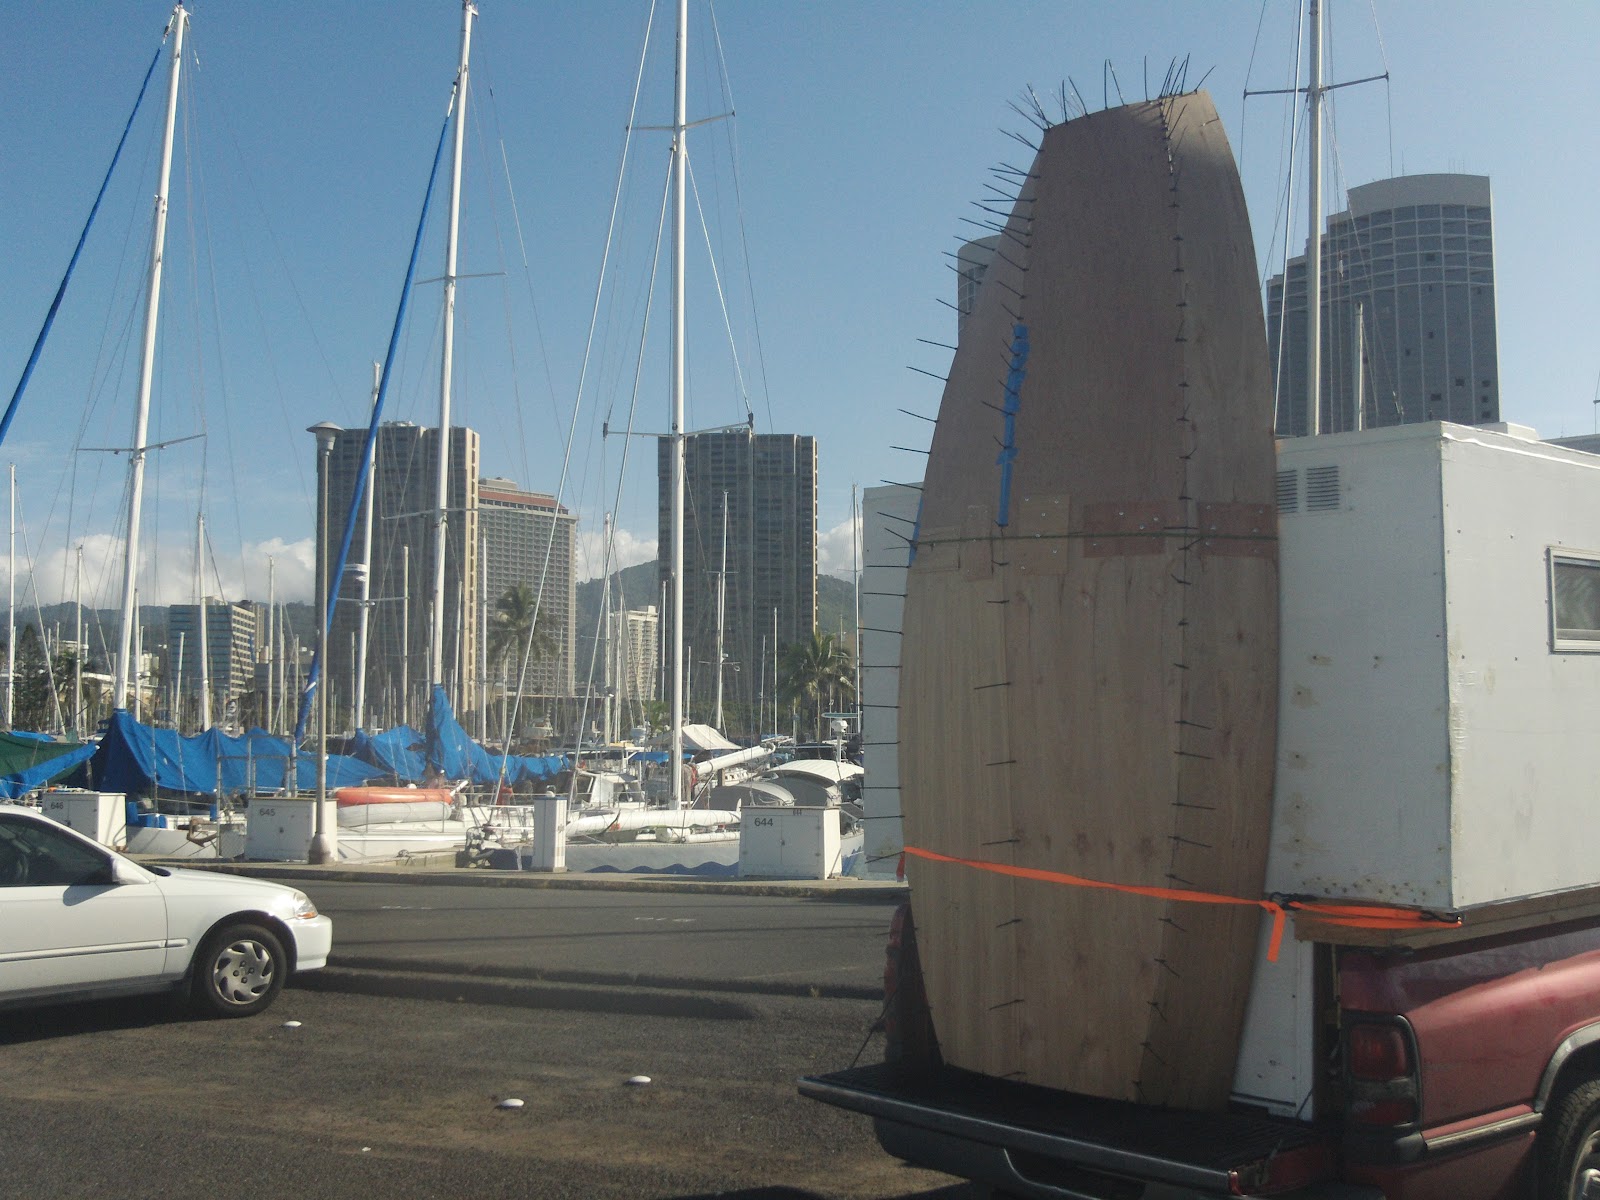
We started the project at the Ala Wai boat harbor.
My Alberg was in her slip thirty feet from the truck so we had power available while we started the project. The plans were well written and the grid pattern was laid out on the sheets of plywood and we cut out the pieces per the instructions. Many thanks to Jeff, Nick, Wallace & Christine for the extra hands and help cutting, holding, zip-tying, etc. Its a challenge working with light pieces of plywood in twenty knot trade winds!


Once we had the pieces all cut out we started to assemble it using some utility rope to "spring" it together. We were rookies and it took some trial and error to figure out how best to approach it but before too long it started taking shape.


We filleted the seams with west systems epoxy and 406 colloidal silica. We loaded it on the tailgate and let the fillets cure overnight.


The next day we split the halves and cut the tie wraps off and did a little fill & fairing with the dingy placed on the dock box. In hindsight it would have been better to drill the holes for the tie wraps closer to the edges of the plywood so that the fillets would not have to be so wide in order to cover them.

.


Monday, August 6, 2012

Sailing Hawaiian Waters

Growing up on Vancouver Island and learning to sail on small engine-less sailboats at a young age, I developed a healthy respect for mother ocean and her many moods. Eight foot tides and ten knots of current thru the many channels and narrow passages were the norm, often with a heavy fog thrown in for good measure. One quickly learned how to read the tide and current tables and plot vectors and keep tabs on cross track error when underway.

   In Hawaii there are only three foot tides and the currents move along at a mere knot or two.
The weather is for the most part clear and beautiful with a constant trade wind blowing 20-25 kts.
The channels and harbors are clearly marked and well lit.
And with those lovely sailing conditions  I was surprised to hear at least one distress call go out on the VHF every day for a boat in trouble! There are several a day for lost persons participating in various water sports but with the huge population of inexperienced tourists visiting the island that's understandable.

   What surprises me is the large number of experienced sailors that get into trouble here. Most have hundreds of hours experience, sailing in more difficult conditions than we have here.
The seas around Hawaii are steep and rough, and I think those steep swells combined with the gusty trades is what leads to most of the problems.
The laid back island style and pleasant weather can lull one into a state of cheerful complacency. Then when sailing out of the harbor all it takes is a jammed halyard and a gust of wind in the channel and you are driven onto the rocks. Its a good idea to have an anchor ready on every approach or departure and have the sails set where you want them before entering the channels.
Though well marked the channels are narrow and they are not the place to be messing around with hoisting or dousing sails.

I watched this unfortunate sailor get a sail halfway up in the channel, then the engine quit and the sail billowed and they were on the rocks! The large swell beat them hard into the rocks and the skipper had to be carried away on a backboard.  By the next day the boat was a loss.


Many vessels Make mistakes near Diamond head. Misreading the light for another and hitting Diamond Head Reef or turning into Hawaii Kai thinking its something else and hitting the reef as this fellow did.


Every Friday night they have a big fireworks display on Waikiki Beach and many boats head out to watch them. We were watching the boats return after the display and watched in horror as this boat took the marker on the wrong side and came to ruin on the reef beside the Ala Wai channel.
The hull drifted into the harbor the next day after the surf ripped the keel off.


So if you plan to sail these waters, don't let the warm weather and laid back island life lull you into complacency when under way. Be ready to 'let go" the anchor when near channels and bays and be sure of your position at night. If you aren't one hundred percent sure you know the channel at night then heave-to until morning and make the approach in daylight. The numerous shore lights can make the approach very confusing at night, even when you've run the channel before.
Its quite disconcerting to be in the channel at night and hear your spotter on the bow who is guiding you towards the next green channel marker say "wait, it just turned yellow! Now its red!"
My butt cheeks clenched tightly together for a moment while we searched for the real channel marker and distinguished it from the numerous traffic lights.

The Islands are a beautiful place to hang out and I am enjoying my time here.....once moored snugly in a safe harbor. I snapped  this sunset shot in Keehi Lagoon with my phone.


Cheers, Don

 Blogging "island style"  _~ _ /)___