I decided to take a break from being scrunched up working under the cockpit and started working on the head so I could work more comfortably for a while. I sat across from the head and visualized the components and where they might go. I cut some plywood, made a mock-up, and placed the toilet on the plinth and stared at it until I had a good picture in my mind of what I wanted to build.

I decided to make the front in two panels, the top with a hinged door in it and the bottom with a removable access hatch to get at the mechanical in the space behind. Templates were made in the usual manner with a hot glue gun and two inch wide strips of 1/8" plywood. The templates were placed onto teak plywood, the outlines drawn and the teak cut to shape and test fit. The access holes were cut and a piece of solid wood that would be used to join the two panels was cut and
routered and sanded to fit. The top panel is 90 degrees to the plinth. The lower panel is offset 11 degrees to match the angle of the toilet back. The solid wood stock will have a two inch setback forming a little shelf to accommodate the offset of the two panels. The wood was taken home to have the finish applied. Eleven coats of Wipe On Poly was applied and the pieces were sanded with 600 grit paper every three coats. Applying the finish took several days to complete.
While waiting for panels to be ready I started preparing the head area. The fiberglass was sanded and cleaned. The listings for the panels were installed and the mounting pads for the strainer, pump, and vented loop were fabricated and epoxied into place and filleted. The space behind the panels was painted with
Pettit Dura White paint,
Pettit claims mould and mildew will not grow on this paint. I have not been able to get the paint to flow and level well regardless of the technique used to apply it. Several types of rollers were tried as well as rolling and tipping, and applying with good quality badger brushes. The finish is suitable for lockers but I will have to experiment with it further to see if I can get better results for use in the cabin.
Several layers of
biaxial cloth was applied to seal the 1-1/2" hole in the hull where the old toilet discharged directly overboard. A location was chosen for the intake
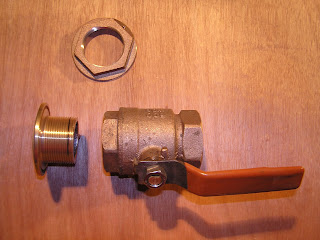
thru-hull and several layers of
biaxial cloth was applied to the hull starting with a large piece and gradually reducing each subsequent piece in size. The next day the adapter flange was test fit and epoxy with high density filler was used to level the area under the flange. This method makes for a very strong, thick base for the
thru-hull assembly and a traditional wood backing plate is not required. The problems of compression fatigue and breakdown or rot of a traditional wood backing block is eliminated.
Contact adhesive was sprayed onto the hull and onto the
Double-bubble insulation that was previously cut to a slightly larger size than required. The insulation was then pressed into place and a razor knife was used to trim the edges. Shrink wrap tape was used to join seams. A heat gun was used to warm the tape and ensure it would not separate with age. If you don't use heat on the tape it often will lift with age. If you use heat it is extremely difficult to remove and will not lift with age.

The strainer, pump, and vented loop were installed.
Vetus water hose was used and
Awab hose clamps with red rubber tips to cover the sharp tail of the clamps finished the assembly.

I was really impressed with the quality of the
Vetus hose. It has a smooth inside wall, and its ability to bend to a tight radius without placing a stress load on fittings is impressive. In the picture below I can easily hold the tight radius with a couple of fingers. Other similar hoses I have used that can bend a tight radius have put a significant stress load on the fittings when doing so and require additional and sturdy fasteners to prevent fitting fatigue.

I took the panels up into the boat and test fit them with the toilet in place. I'm happy with the fit and will set them aside for installation at a later date after the plumbing is completed. The lower hatch is large enough for me to get one arm and my head comfortably into. The top hatch is large enough to get two arms and my head into so I can work on the chain-plates when required.


